Hi ya'll! I've been busy working on Connors quilt and I'm thrilled to say it's finished and I'm very happy with it. When I planned this quilt it was going to be larger than a generous crib size but of course smaller than twin bed size. It was going to be 6 oversized log cabin blocks, a red, yellow, 2 blue, a green and an orange. By the time I finished the 4th block I realized if I added two more it would be too large. This is for him to lay and play on, then in a few years be a napping quilt. I brought in a bright yellow in my soft, warm, flannel backing which I also used for the binding. I used cotton batting and after seeing the difference in the weight and feel of the quilt I will never use polyester batting again! This quilt is so warm and snuggly. Of course there were many days I devoted the entire day to this quilt, so as usual I found some quick easy recipes on my Pinterest boards for those days. I still want hubby to come home to a great dinner even though I've been busy. I'll share those at the end of the post but first, here's some start to finish pics.
After cutting strips of blues and my white chevron patterned fabric, I completed the first block. It's always the 2nd most exciting, the last block is the most exciting.
Then the orange , green and red.
I did the qayg method (quilt as you go), as I have a sewing machine that quilts, not a long arm quilter so I could never get the entire quilt top through my machine and maneuver it through the small opening. I prepared each block and quilted them.
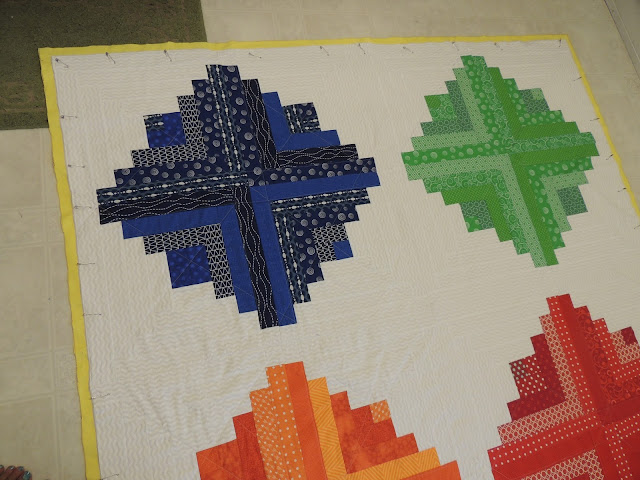
After quilting all 4 blocks, I trimmed them, then sewed them all together. Now I could see what it was really going to look like and the finished size. Flannel only comes in standard 45" widths, so I sewed 2 80" long pieces together for the backing. Now the part I don't like was here, crawling around on the kitchen floor to attach the quilt top to the backing, pin those 75 quilters pins all around the quilt, take my quilters ruler and draw a line 1" around all 4 sides, then trim the excess backing off.
I drew diagonal lines on each corner and quilted those so the quilt top is attached to the backing on each side as well as the binding. I ironed my 1' halfway in and pinned all around the quilt, mitering the corners. Now the most exciting time was here, sewing the binding on! When I got to the 4th side towards the bottom I snapped this pic. I knew I was a minute away from "Done!"
Here it is!
Some of the lines made with my Disappearing Fabric Marker Pen are still doing their magic act. Most are already gone. I can't wait to see Connor laying on his quilt. Now for those "I've been sewing all day" recipes. Hubby loved this one!
Don't let the photo fool you. It looks fancy, and tastes wonderful, but the oven does all the work and the yummy bean salad takes 6-7 minutes. You can find them here:
The next day I sewed all day I made this
Yummy!
My finishing day of the quilt I made these baked Cuban sammies with a mustard sauce spooned on top and smashed potatoes. Quick. Easy. Yummy. The oven did the work as there's very little prep.
http://www.bhg.com/blogs/delish-dish/2015/05/26/fried-smashed-potatoes-recipe/
Well my work here is done. I have a few more sweet little things to make for Connor then some fabric baskets for my Etsy shop. I think these HGTV fabrics I bought will produce some beautiful storage baskets. Till next time, Blessings! Gina


No comments:
Post a Comment