
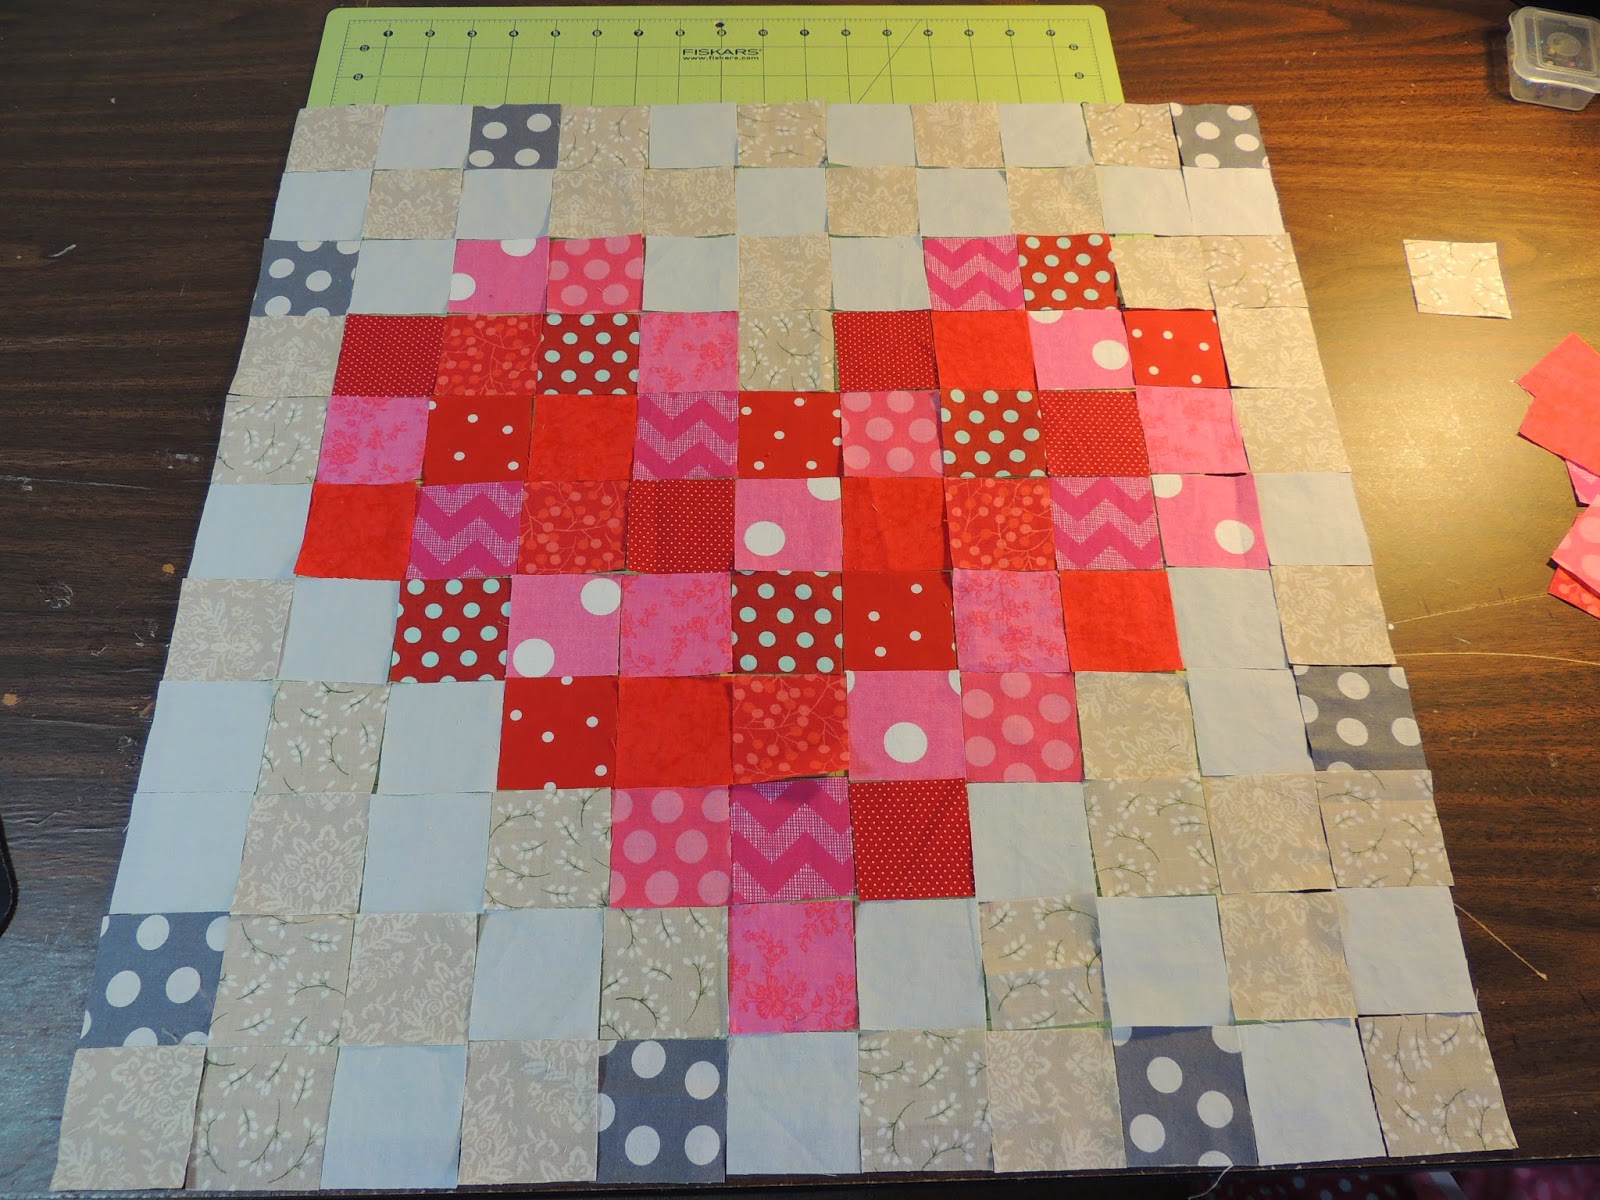
I made a wall hanging years ago with this heart made of squares. I decided to make a pillow and show you how to make this block. It's a great sewing project for a beginner, and of course you could make several for a crib or lap quilt. I'm using all scrap fabrics from past projects, so I didn't purchase anything to make this. Even the pillow form is recycled from an old pillow cover I've grown tired of. First I chose scrap fabrics in reds and pinks, then chose my neutrals. I must be allergic to neutral fabric because I had a couple of pieces, literally. I used my mat and rorary cutter and cut strips 2"wide. I then cut those by 2" so now I had perfect 2" squares. This requires 46 of these. I cut my neutrals into 2"strips, then cut those in 2" squares as well. 75 are needed. I layed them out in the pattern, and made sure I liked where the overall look. Then I photographed the block with my camera. Very Important! You will be referring to that photo from now on so it'd be a good idea to pull up the photo on your computer when you start to sew.
Starting with the first row, sew the row going down using 1/4 inch seam allowance. Make sure, using your photo that you have the order correct. Now iron the seams facing down towards the bottom of the block. Place back down being sure the top and bottom of that row are correct, according to your photo. Continue till all your rows are done and all the seams are ironed down.
Now make sure everything is correct, then start sewing your rows together using 1/4 inch seams. Be careful when you pin two rows together, you are pinning the correct sides together. Sew all the rows together.
When you flip your block over it will look messy. Iron your new seams in one direction. It doesn't matter if it's left or right, as long as they're all facing the same way.
Now the top of your pillow is done. Pin it onto your backing fabric and carefully cut a little outside your pillow top. If you have a mat and cutter, just measure your top and cut backing to that size.
Now sew starting about 2 inches before a corner, and keep going until you get to the side you started sewing first, and when you come around the other corner on that side , stop after about two inches. Of course always backstitch when you begin sewing and when you stop. You should have 3 sides closed and the 4th side will be open enough to turn and put your pillow form in.
While the pillow top is still wrong side out, trim across the corners being careful not to come close to your stitching.
Turn your fabric right side out. Insert your pillow form and if needed add some fiberfill to the inside corners and along the sides. The pillow cover is more rectangle than square so there will be areas to be filled in. Fold the opening even with the sides, and pin. Hand sew your opening closed. Enjoy your work and being able to say "Thanks, I made it."


No comments:
Post a Comment