Pages

How to make a Pillowcase Dress Part 1

Wednesday, January 28, 2015

The Pillowcase dress. Reminiscent of days gone by when women really did use everything they had and turned them into something new. Guess we're not the first upcyclers! I've had so many compliments from people on the pillowcase dresses I've made that my step daughter wears and many people have told me they would love to learn how to make them. They're easy and I think even you beginner sewists can do this, and you'll see, the more you make, the less time they take. Here's a few I've made.

Gina


 Cutting chart
 12-24 mos.  - 2 Panels 14 1/2 L x 18 W * 2 bands 8 L x  18 w * 2 ties 2 1/2 x 15
2T- 2 Panels 16 1/2 L x 20 w *  2 bands 8 x 20 * 2 ties 2 1/2 x 16
3T- 2 Panels 18 1/2 L x 21 W * 2 bands 8 x 21 *2 ties 2 1/2 x 17
4T-2 Panels 20 1/2 L x 21 W * 2 bands 8 x 21 * 2 ties 2 1/2 x 17
5- 2 panels 21 L x 21 W * 2 bands 9 x 21 *2 ties 2 1/2 x 18
6- 2 panels 22 L x 21 W * 2 bands 9 x 21 * 2 ties 2 1/2 x 19
7- 2 Panels 22 1/2 L x 21 W * 2 bands 10 x 21 * 2 ties 2 1/2 x 19
8-2 Panels 25 L x 21 W * 2 bands 10 x 21 * 2 ties 2 1/2 x 19
  Now go to Part 2

How to make a pillowcase dress - Part 2


               Armhole measurements
12 mos - 24 mos   measure in 3 1/2 in. across the top, and 4 in. down the side.
3T - 4T-  Measure in 3 1/2 in. across the top of the dress, and 4 1/2 in. down the side of dress.
5 - 6- Measure 3 1/2 in. across the top of dress and 5 in. down the side of dress.
7-8-Measure 4 in. across the top of the dress and 6 in. down the side of the dress.
Always prewash, dry, and iron your fabrics before cutting. Always backstitch at the beginning and end of your stitching.
                                          Ready to get started?
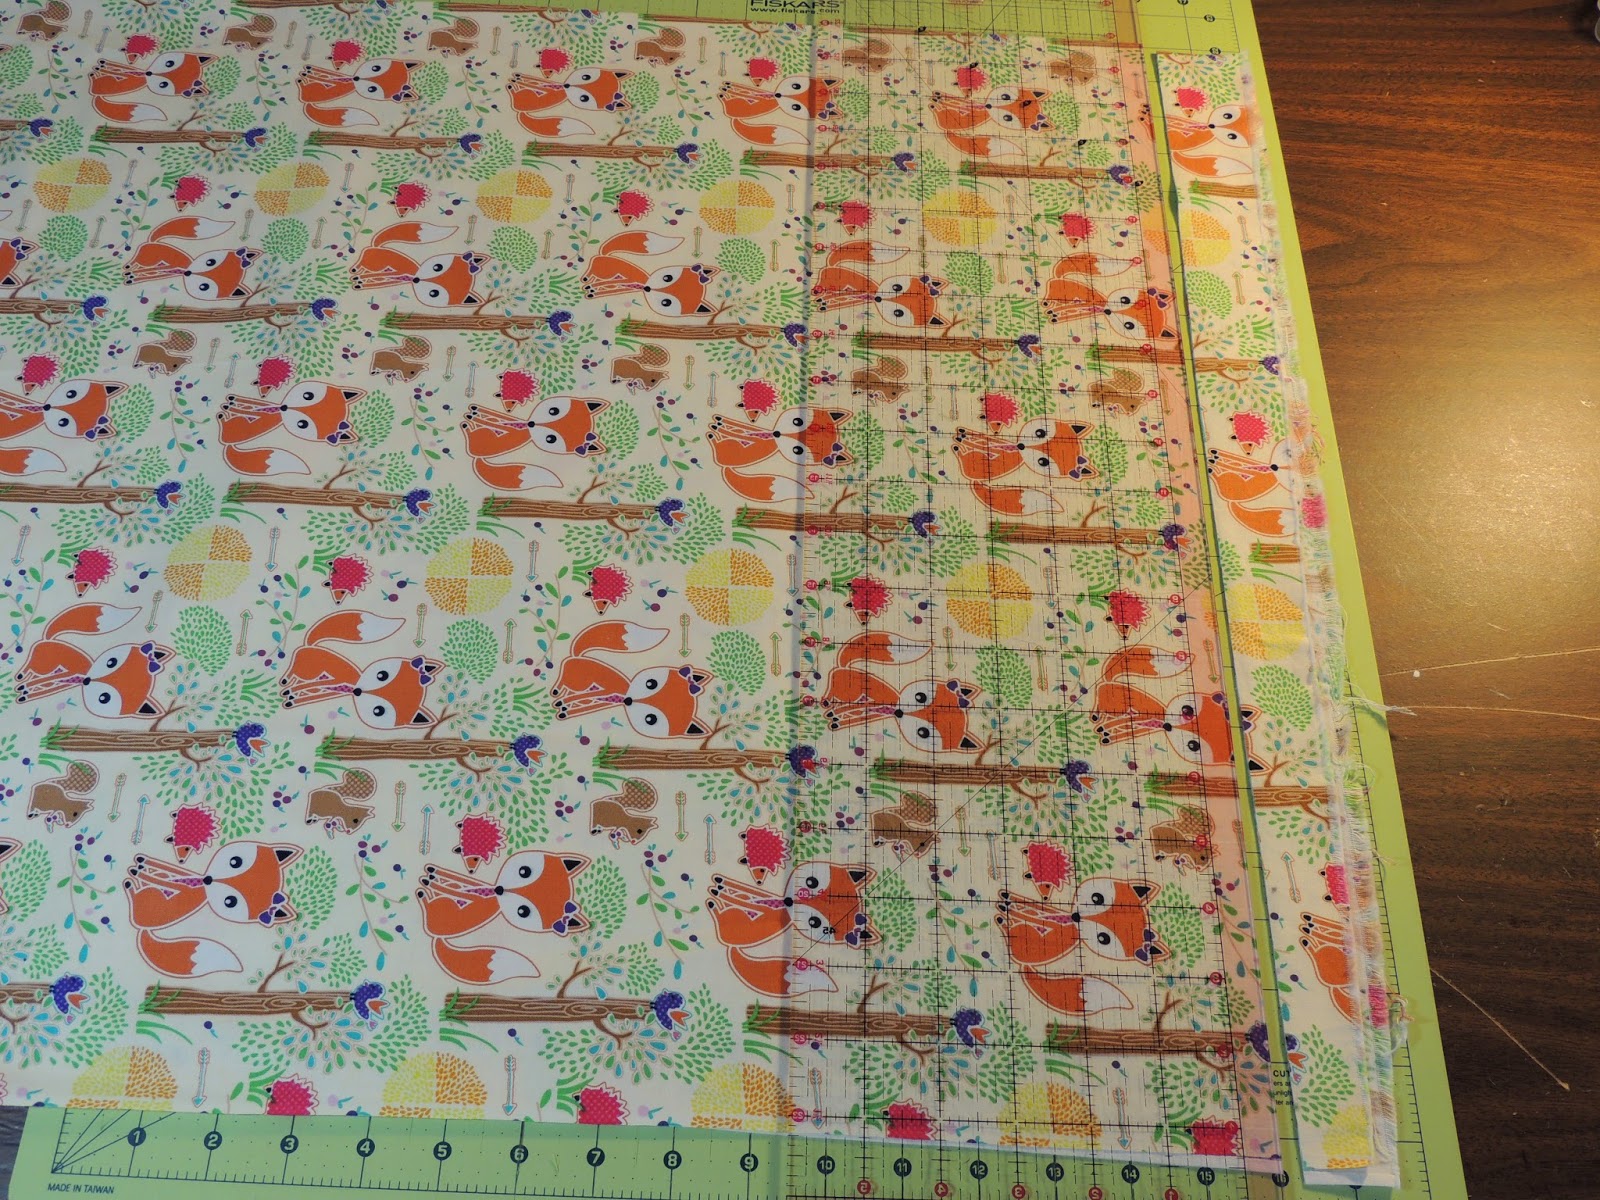
Cut your 2 panels for the front and back. Be sure if you're using a "directional" fabric, which means there is a right side up because of the graphics, that when you cut your length the fabric is turned the right way. Always cut an inch or so off before you make your first cut to make sure that side is straight.


Now you have your 2 panels for the dress cut. Notice when I cut my fabric I was careful to make sure the foxes are facing the right way, so here is my cut after I'm through. Now proceed to part 3 of the pillowcase dress tutorial and it will take you the rest of the way.
 

How to make a pillowcase dress Part 3

Now cut your band pieces. By folding your fabric you can cut your width, then cut that piece in the lengths you need.


Cut your ties in the width you need, then cut the lengths you need. If you want longer ties and a bigger bow, add a few to several inches to your length.

Now prepare the band to be sewn to the bottom of the dress. Fold in half with "right" sides out, matching the sides and raw edges and iron. Repeat with the other band.
Now turn the panel you are sewing the band to upside down. Line the raw edges of the band with the raw edge and sides of the dress. Pin across the bottom.

Now sew the band to the panel with a 1/2 inch seam.
Remove your pins and keeping the band flipped up, zig zag stitch all the way across the band staying close to the edge. This will help prevent fraying.
Iron the band, making sure you iron the seam where you just sewed up towards the dress not down. Repeat with the other panel and band.
Now lay your two dress pieces down, right sides facing each other, so you are looking at the back on the top piece. Make sure they are lined up on all sides. Find the measurements for the arm holes for your size, make a mark at those points,  then lay your ruler across touching those 2 points and cut. Repeat with the other side.

Now turn the armholes under 1/4 inch and iron, then turn under 1/2 inch again and iron.
Now sew just inside the edge of the fold from the top of the armhole fabric to the bottom. Repeat for the other 3 sides.
Now your bands and armholes are done!
Now lay your two dress pieces down, right sides facing, line up the sides and pin the sides only.
Sew the sides of the dress using a 1/2 inch seam allowance, then do a zig zag stitch close to the edge all the way down. You should catch the bottom sides of the armhole when you sew the sides.
Now you need to topstitch. Open your dress, right sides out, and place the bottom of the dress on your machine so that you can "roll" the dress around as you stitch. You will be stitching just above the band on your dress, making sure the band seam is still pointed up.
Now the casing. Turn one of the top edges of your dress under 1/4 inch to the inside and press, then turn under 1 1/4 inch and press again, then pin. Repeat with the other side.
Now stitch across the long edge, staying just inside the edge you folded under. Do not sew the sides closed, that's where your ties will go through. Repeat for your other side.


You can get very excited because we're almost through! If you prefer large grosgrain ribbon for your ties,    go to the step below for putting your ties in the casing, and when you cut and insert them, you're done! For fabric ties, lay one of the ties down and fold in half with right sides facing on the inside. Make sure your sides are even and press.
Now  sew with a 1/4 inch seam allowance starting on one short end, turn,then come down the long side and stop at the bottom leaving the other short end open for turning. Pull as much fabric as you can out of the open end. When you get an inch or so out, take something that isn't sharp, like my dowel with a flat end, and use it to push the fabric out. When all of the fabric is out, insert the dowel and push out the corners on the end and push out your side seams.
Now turn the raw end of the open end to the inside about 1/4 inch. Lay your tie down, making sure the seam runs down one side on the outside and press. Now sew around all four sides close to the edges. Repeat for your other tie.
Now attach a safety pin to one end of a tie. Use the safety pin to push the casing from one side of a panel to the other side of that panel. Pull the excess fabric to the middle of the casing so it "gathers."Repeat for the other panel.

Your pillowcase dress is done! The more you make, the faster you will get. I hope your recipient loves her dress. Here's a few more I've made. I've had a lot of fun with these.


 Gina

Valentines Day Crafts, Decor and sewing

Friday, January 23, 2015

Hi and welcome to my blog and my very first post! I've been sewing, cooking, quilting, scrapbooking, crafting and thrifting since before it was cool. I am so excited to see a return to hand crafted and hand sewn. Things made by hand are from the heart and unique. I've been sewing and selling for over a year locally and on Etsy. You can click on the Etsy button and go right into my little shop to see what's there waiting for a good loving home. Now I want to devote my first post to Valentines Day which is just three weeks away. I've come up with several projects from patchwork, sewing, using mason jars, and scrapbooking cardstock. I made the pillow over a two day period and the other crafts combined took only about two hours. So you have plenty of time to get these done and be able to enjoy them as a tradition every year. My display area for seasonal projects is a vintage door that I got at a yard sale and had a friend build shelves for it and put "feet" on it so it doesn't fall. When you don't have a mantel, be creative and find something else that grabs attention and will hold the same types of things a mantel would. I love these projects and I hope you will too!


Patchwork Heart Pillow for Valentines Day


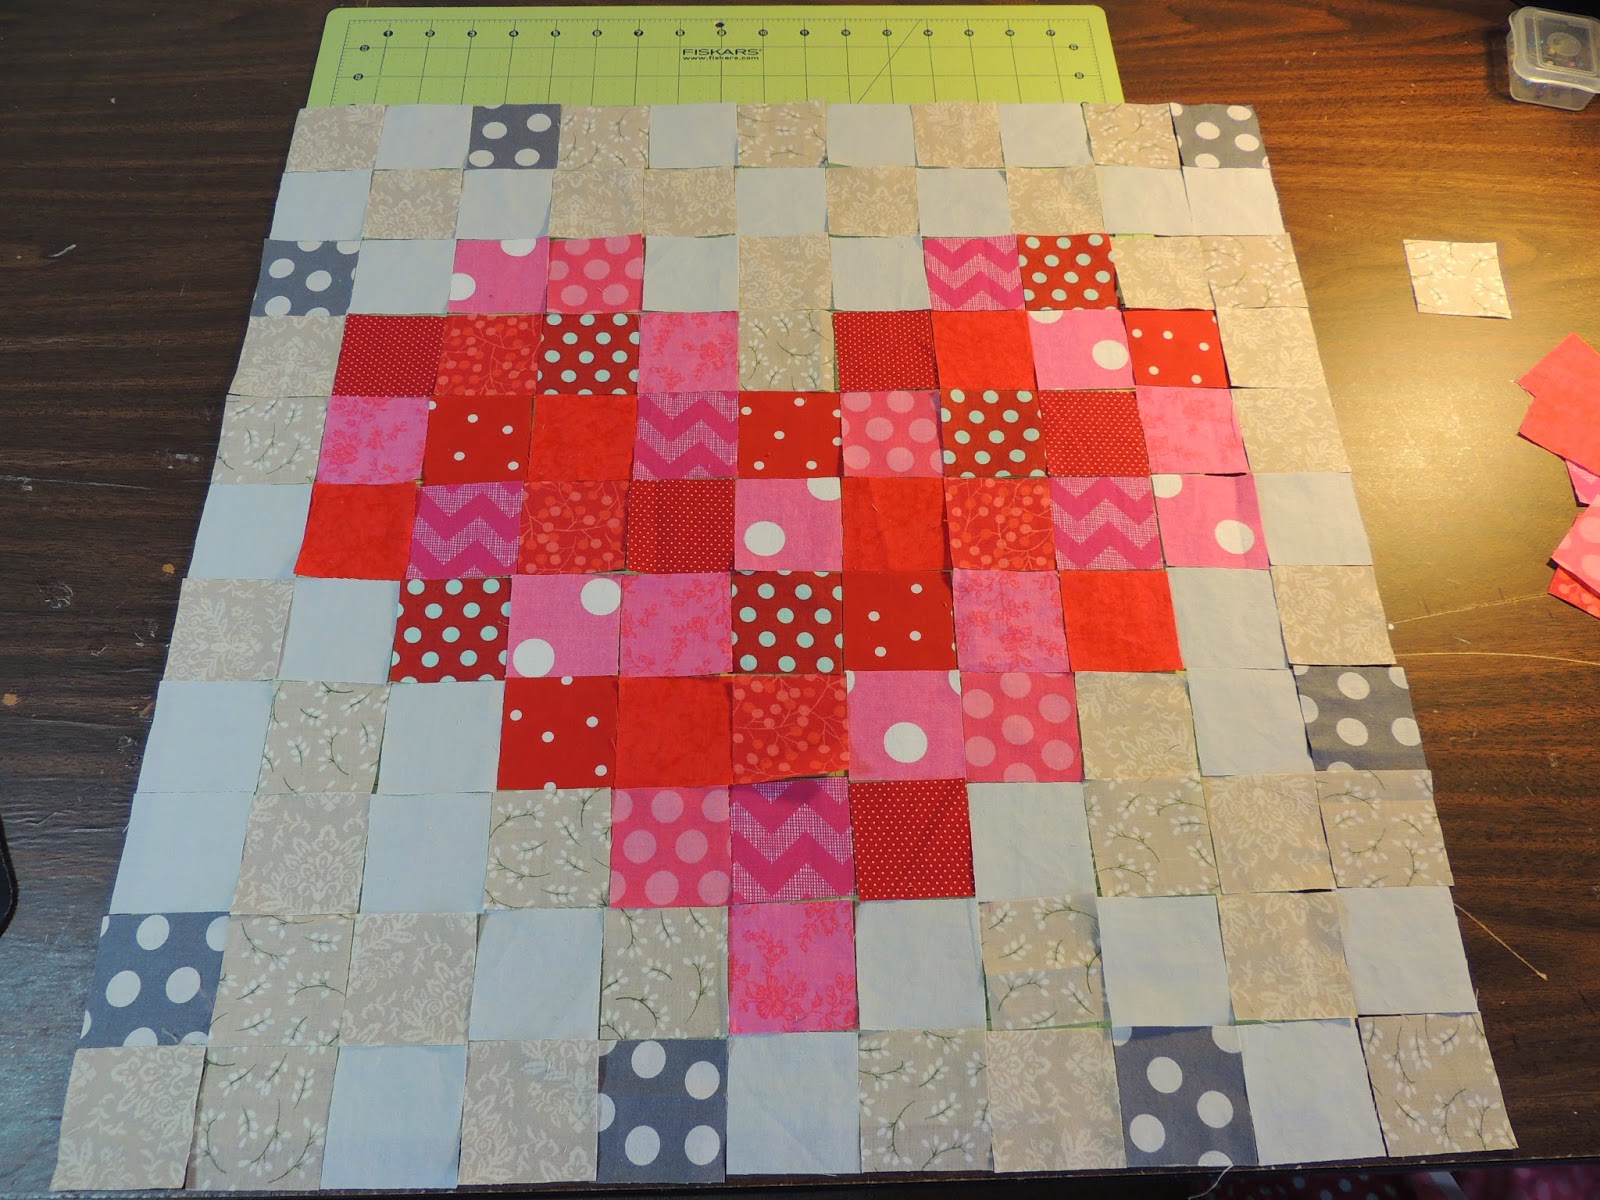
I made a wall hanging years ago with this heart made of squares. I decided to make a pillow and show you how to make this block. It's a great sewing project for a beginner, and of course you could make several for a crib or lap quilt. I'm using all scrap fabrics from past projects, so I didn't purchase anything to make this. Even the pillow form is recycled from an old pillow cover I've grown tired of.  First I chose scrap fabrics in reds and pinks, then chose my neutrals. I must be allergic to neutral fabric because I had a couple of pieces, literally. I used my mat and rorary cutter and cut strips 2"wide. I then cut those by 2" so now I had perfect 2" squares. This requires 46 of these. I cut my neutrals into 2"strips, then cut those in 2" squares as well. 75 are needed. I layed them out in the pattern, and made sure I liked where the overall look. Then I photographed the block with my camera. Very Important! You will be referring to that photo from now on so it'd be a good idea to pull up the photo on your computer when you start to sew.
  Starting with the first row, sew the row going down using 1/4 inch seam allowance. Make sure, using your photo that you have the order correct. Now iron the seams facing down towards the bottom of the block. Place back down being sure the top and bottom of that row are correct, according to your photo. Continue till all your rows are done and all the seams are ironed down.
 Now make sure everything is correct, then start sewing your rows together using 1/4 inch seams. Be careful when you pin two rows together, you are pinning the correct sides together. Sew all the rows together.
  When you flip your block over it will look messy. Iron your new seams in one direction. It doesn't matter if it's left or right, as long as they're all facing the same way.
 Now the top of your pillow is done. Pin it onto your backing fabric and carefully cut a little outside your pillow top. If you have a mat and cutter, just measure your top and cut backing to that size.
  Now sew starting about 2 inches before a corner, and keep going until you get to the side you started sewing first, and when you come around the other corner on that side , stop after about two inches. Of course always backstitch when you begin sewing and when you stop. You should have 3 sides closed and the 4th side will be open enough to turn and put your pillow form in.
  While the pillow top is still wrong side out, trim across the corners being careful not to come close to your stitching.
  Turn your fabric right side out. Insert your pillow form and if needed add some fiberfill to the inside corners and along the sides. The pillow cover is more rectangle than square so there will be areas to be filled in. Fold the opening even with the sides, and pin. Hand sew your opening closed. Enjoy your work and being able to say "Thanks, I made it."